 Social Place
How to build an online community for your Shopify store
An online community doesn’t take off in a week. It’s a long-term investment: count in months, not days, before customers post without being asked. The first steps are simple, though, and most of the work comes down to posting regularly. Here’s how to start one on your Shopify store, with one example all the way through.
To keep it concrete, we follow one example: a small shop that sells ceramics and candles and runs pottery workshops.
First, a word on your niche
Some topics are naturally social. People love to show what they make, compare routines, ask for advice and share what they collect: crafts, beauty, pets, home, fashion, sport. If your customers already talk about these things on Instagram, they’ll talk about them on your store too.
If your product is something people buy once and forget, the community won’t be about the product. It will be about the life around it. A clothing store doesn’t need a forum about T-shirts. It needs a place for outfits, styling tips and the backstage of each collection.
The plan at a glance
- Put the community on your store
- Create three to five categories from real questions
- Fill it with posts and photos
- Talk about the world around your products
- Give people a reason to come back
- Post every week, reply every day
- Give it time
Step 1: Put the community on your store
Your customers already have an account on your store, and your products are one click away. A forum on your store uses both: customers sign in with the account they already have, and a question about a plate sits right next to the plate. A Discord server or a Facebook group asks them to join another platform first. We compare the three options in Discord, Facebook group or a forum on your store?
Then make it easy to find:
- Your main menu: give the community its own menu item, visible on every page, rather than hiding it in the footer.
- Your homepage: a section that presents the community or shows its latest posts.
- Your newsletter: one line with the link, in every issue.
- Instagram: the link in your bio.
Setting it up takes an afternoon: see how to add a forum to your Shopify store.
Step 2: Create three to five categories from real questions
Don’t invent your categories at your desk. Your customers have already told you what they want to talk about. Open your inbox, your Instagram messages and your reviews, and copy the last 30 questions and comments into a list. Then group them.
For our ceramics shop, the list looked like this:
| What customers wrote | Category |
|---|---|
| “Can the slate plates go in the dishwasher?” | Ask before you buy |
| “My candle is tunneling, is that normal?” | Care and repairs |
| “Here’s my table with your plates!” | Your photos |
| “When is the next workshop?” | Workshops |
| “Will the blue bowl come back?” | News from the shop |
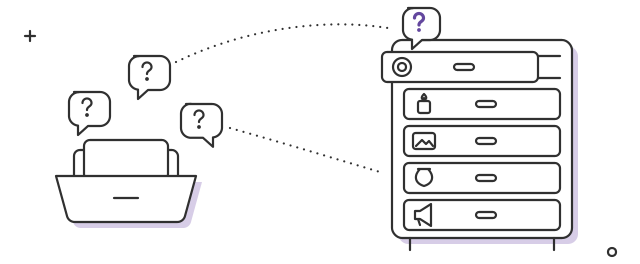
Five groups, five categories. Three rules when you set them up:
- Use your customers’ words. “Ask before you buy” is clearer than “Pre-sales”.
- Keep one category for your news (launches, restocks, events), so promotions don’t drown the conversations.
- Add a category only when a topic outgrows its place. Ten categories with two posts each look abandoned. Four busy ones look alive.
Step 3: Fill it with posts and photos
An empty forum, or one where only the brand speaks, rarely takes off: nobody wants to be the first person in an empty room. So at launch, filling the forum yourself is normal. Publish in every category before you add the link to your menu, and aim for 20 or 30 posts with photos. It’s a launch tool, not a habit: once members start posting, step back and give them the floor.
Mix several sources, so the forum doesn’t look like a catalogue:
- Starter posts written by your team. Post the questions customers really ask you, with the answer (“A question we get a lot: can the slate plates go in the dishwasher?”), open questions and polls. Each person posts under their own name: Clara, who packs the orders, and Hugo, who runs the workshops.
- Your Instagram posts. With an app like Social Place, they’re imported into the forum automatically, comments included, so the forum grows every time you post on Instagram.
- Posts where customers mention you. When a customer tags your shop on Instagram, their post can be added to the forum too. These are real customer posts, and they show newcomers that people like them are already here.
- Reviews left elsewhere. Google reviews, the reviews on your store, a comment under an Instagram post: share them in the forum with the customer’s first name and where they wrote it, and ask before reusing a photo.
- People you know. Friends, regulars and partners who use your products: ask them to post a photo or answer a question, under their own name.
One limit: never pretend to be a customer. Don’t invent members and don’t post under someone else’s name. It misleads your visitors, and in many countries, posing as a consumer is against the law.
Add photos wherever you can. A post with a photo gets more replies than a block of text, and a forum full of real tables, real kitchens and real outfits looks alive at first glance.

A first post that gets replies
Skip the formal welcome message: nobody replies to “Welcome to our community”. Open with a photo and a question anyone can answer in a few seconds.
Photo: two plates side by side on the workbench, one slate gray, one sage green.
Two glazes, one plate: which one should we fire for spring?
Left: slate gray. Right: sage green. Vote in the comments. The color with the most votes goes in the kiln on Friday, and we’ll post the result here.
Clara, from the shop
Other posts that get people talking:
- This or that: two photos, one choice. People love to pick.
- Show us yours: “Where does your candle live? Post a photo.”
- Help us decide: the name of a new scent, the theme of the next workshop.
- Photo of the week: the best member photo, featured every Friday.
Step 4: Talk about the world around your products
A community where every post sells something empties fast. People come for the topic, the tips and the other members, not for the catalogue. Keep promotions in your news category and talk about everything else the rest of the time.
| Store | Instead of | Post |
|---|---|---|
| Clothing | “New: the linen shirt” | “Three ways to wear a linen shirt this fall”, or the backstage of the photo shoot |
| Ceramics | “The slate plate is back in stock” | “How we glaze a plate”, with a photo of the kiln before a firing |
| Beauty | “20% off the serum” | “Your morning routine for dry skin” |
Behind-the-scenes posts work especially well: how a product is made, packed or chosen, the mistakes, the samples that didn’t make it. They’re easy to write, and nobody else can post them.
Step 5: Give people a reason to come back
Customers come back when the community gives them something they can’t get elsewhere. Three levers work well together:
- Discounts for taking part. Members earn points for their posts, comments and purchases, and unlock a discount code at each level. Posting becomes worth their while.
- Badges. A badge next to their name shows everyone how involved they are. Regulars love it, and it costs you nothing.
- Exclusive content. Launches announced there first, restock dates, a members-only category, or even a paid space for your most dedicated fans.
Name the levels in your brand’s voice. For our ceramics shop:
| Level | Points | Reward |
|---|---|---|
| 🌱 Newcomer | 50 | A badge next to their name |
| 🕯️ Regular | 300 | A 10% discount code |
| 🏺 House Favorite | 900 | 15% off and access to a private “Regulars Club” category |

- 🌱 Newcomer50 points
- 🕯️ Regular300 points · 10% off
- 🏺 House Favorite900 points · 15% off and the private club
Make the first level easy to reach (a few comments), so new members see it work in their first week.
Step 6: Post every week, reply every day
A community stays alive when something new happens regularly. Pick a weekly rhythm you can keep:
| Day | Post | Example |
|---|---|---|
| Monday | An easy question | “What’s on your table this week?” |
| Wednesday | Behind the scenes | A photo of the kiln before a firing |
| Friday | A photo thread | “Show us your new candle” |
Then spend a few minutes each day in the forum:
- React to every post and comment. A like or a heart takes a second, and it tells members someone saw them. People come back where they feel noticed.
- Reply to every new post the same day. Thank people by name and ask a follow-up question.
- When a customer answers another, wait. Give it a few hours, then add only what’s missing. That’s how members learn that their answers count.
Step 7: Give it time
This is the step most brands skip. The first months can feel quiet: a few replies, often from the same people. That’s normal. Keep posting, keep replying, and watch these signs rather than the number of sign-ups:
- Members who post or comment each month.
- Questions answered by another customer before your team replies. When this starts happening, the community is taking off.
- Members who come back week after week.
- Orders from active members compared with your other customers.
Depending on your niche and your audience, it can take several months before customers post on their own. Communities grow on consistency, not on a big launch.
Five mistakes to avoid
- Leaving the forum empty for too long. An empty forum for a few days is no big deal. If it stays empty, visitors read it as a sign that nobody comes. Post early, so it stays empty for as short a time as possible.
- A forum without a soul. Customize it: your colors, your banner, your words in the category names. Visitors should feel your brand, not a generic template.
- Posts that sound like ChatGPT. Write the way you talk, with your words, your photos and your mishaps. If AI helps with a first draft, rewrite it your way. Posts that look generated don’t get read.
- Brand posts only, with promotions everywhere. Mix your team, your Instagram and your customers, and keep promotions in one category.
- Giving up after a few weeks. Count in months.
FAQ
How long does it take to build an online community?
Months rather than weeks. Expect several months of regular posting before customers post on their own. It depends on your niche and on how many customers you already have.
Which stores are best suited for a community?
Stores whose customers already like to show, compare or ask: crafts, beauty, pets, home, fashion, sport. For other products, build the community around the lifestyle and the behind the scenes rather than the product itself.
How do I fill an empty forum?
Post first, with photos, in every category: starter posts from your team under their own names, your Instagram posts, the posts where customers mention you and reviews left elsewhere. Never pretend to be a customer.
How do you keep an online community active?
Post on a weekly rhythm, reply the same day and give members reasons to come back: discounts for taking part, badges and exclusive news.
Is a Facebook group or a Discord server enough?
They can work, but customers have to join another platform first and the conversations stay far from your products. A forum on your store keeps them next to your products, with the account customers already have.